

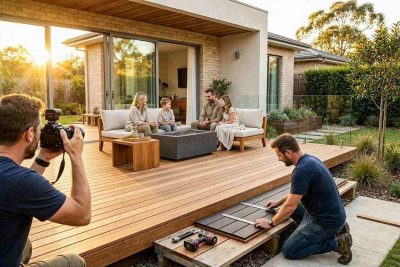
 Photography is all about capturing light, composition, texture, and emotion. A beautiful image rarely happens by accident. Behind every great photograph is a carefully planned setting that allows each element to work together. The same principle applies to outdoor living spaces. A skilled Master Groups deck builder does more than construct a platform. They create an environment that naturally becomes the perfect backdrop for everyday life and memorable photographs.
Modern homeowners enjoy documenting family gatherings, celebrations, and quiet moments spent outdoors. Birthdays, holiday meals, children’s milestones, and evening dinners are often shared through photographs that preserve special memories. A thoughtfully designed deck enhances these images by providing an attractive setting filled with natural materials, balanced proportions, and beautiful outdoor surroundings.
Unlike temporary decorations, a professionally built deck becomes a permanent feature that improves both the appearance and functionality of a property. It frames gardens, complements landscaping, and creates a seamless transition between indoor and outdoor spaces. Every photograph taken within this environment benefits from the careful planning that went into its design.
Natural timber remains one of the most photogenic building materials available. Its rich grain, warm tones, and subtle variations create visual depth that looks appealing in every season. Whether photographed during the bright light of summer or the softer colours of autumn, timber decking provides a timeless foundation that complements people, plants, and architecture alike.
Great Deck Design Creates Better Visual Composition
Professional photographers understand the importance of composition. Strong leading lines, balanced framing, and natural focal points guide the viewer’s attention through an image. A skilled deck builder unknowingly applies many of these same principles while designing outdoor spaces.
Deck boards create clean linear patterns that naturally draw the eye across the space. Well-positioned stairs, pathways, and built-in seating help organise the backyard into visually balanced sections. These structural elements not only improve functionality but also strengthen the overall appearance of photographs captured within the area.
Landscaping further enhances the visual experience. Gardens surrounding the deck soften hard surfaces while introducing colour, texture, and seasonal interest. Flowering plants, ornamental grasses, mature trees, and decorative shrubs create natural layers that make photographs feel vibrant without overwhelming the main subject.
Outdoor furniture also contributes to composition. Carefully selected dining tables, lounge seating, and decorative accessories help create inviting scenes that appear comfortable and lived in. Instead of feeling staged, the space reflects genuine everyday living, making family photographs appear warm and authentic.
Lighting plays an equally important role. Morning sunlight highlights the natural grain of timber, while afternoon light creates warm shadows across the decking surface. During the evening, subtle deck lighting and decorative string lights produce an inviting atmosphere that photographs beautifully without harsh contrasts.
Perspective matters as well. Elevated decks often provide better viewing angles across gardens or surrounding landscapes. Whether overlooking a swimming pool, native garden, or open lawn, the deck becomes a viewing platform that allows homeowners to appreciate their outdoor environment while creating opportunities for striking photographs.
Professional deck builders understand how these design elements interact even if photography is not their primary focus. Their attention to proportion, balance, and spatial planning naturally creates outdoor settings that look attractive both in person and through the camera lens.
Choosing a Deck Builder Who Delivers Lasting Beauty
A beautiful deck begins with careful planning and quality craftsmanship. Experienced builders take time to understand the property’s layout, the homeowner’s lifestyle, and the architectural style of the home before recommending a suitable design. This personalised approach ensures the finished structure complements its surroundings rather than competing with them.
Material selection is one of the most important decisions during the project. Quality hardwood provides timeless character and exceptional durability, while composite decking offers a modern alternative with reduced maintenance requirements. Professional builders explain the strengths of each option so homeowners can choose the solution that best suits their needs.
Construction quality directly influences the appearance of the finished deck. Straight board alignment, precise spacing, secure framing, and carefully finished edges all contribute to a polished result. These details may seem small individually, but together they create a structure that photographs beautifully while remaining strong and reliable for many years.
Maintenance guidance also protects the investment. Regular cleaning, occasional sealing of timber surfaces, and routine inspections help preserve both appearance and structural integrity. A well-maintained deck continues to provide an attractive setting for outdoor living long after construction has been completed.
Homeowners should also choose builders who communicate clearly throughout the project. Detailed quotations, realistic timelines, and transparent recommendations create confidence while reducing unnecessary stress. Experienced professionals understand that successful projects depend just as much on communication as construction skills.
Ultimately, a professional deck builder creates far more than an outdoor structure. They design a space where families celebrate birthdays, enjoy weekend barbecues, read books in the afternoon sun, and watch children grow through every stage of life. These ordinary moments often become treasured photographs that preserve memories for years to come.
Just as photographers carefully compose every image, experienced deck builders thoughtfully shape outdoor environments that balance beauty, comfort, and function. The result is an inviting space that enhances everyday living while providing the perfect backdrop for countless memories, ensuring every photograph tells a story that homeowners will enjoy revisiting for generations.


 Water is 72% transparent in its purest form, yet in photography, even the slightest tint or haze can destroy an otherwise perfect shot. For food and beverage photographers, water quality is not a background concern. It is the first thing to get right. Murky, yellowish, or cloudy water will translate directly onto the sensor, and no amount of post-processing will fully recover what should have been crystal clear from the start.
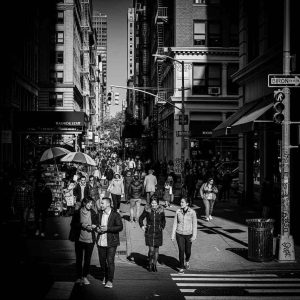
 From red carpet premieres and networking mixers to weddings and product launches, New York has thousands of events to host every year. In almost all such settings, one would expect stunning environments that are a haven for photography. Step and repeat backdrops are favored for their ability to instantly establish a recognizable photo station. This is for anyone who knows what they’re looking for, whilst adding to the professional appearance of the venue. These displays are often crowded by visitors who come out to take pictures, and they will provide the photographer with a more predictable shooting environment.
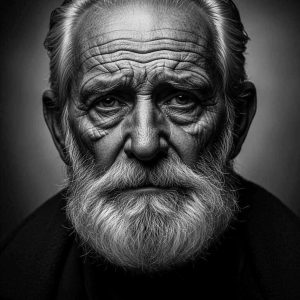

 The Last Roll, which came out in 2013, is very important. After being told he had cancer, Jacobson stopped working for magazines and focused on more personal projects. Using his last rolls of Kodachrome film, which Kodak stopped making, he made a set of pictures that are both personal and general.
 Finding striking compositions is one of the main difficulties in photographing tow trucks. Some photographers choose to accentuate the automobiles’ individual characteristics and textures, emphasizing them. Others want to use the tow trucks as narrative components and include them in more expansive settings.
 Showcasing natural backdrops like mountains, woods, and beaches.
 Make whirling patterns or streaks of light by directing your light source in different directions.
 Proper placement of reflectors is crucial in order to achieve the desired effect. Here’s a straightforward guideline:


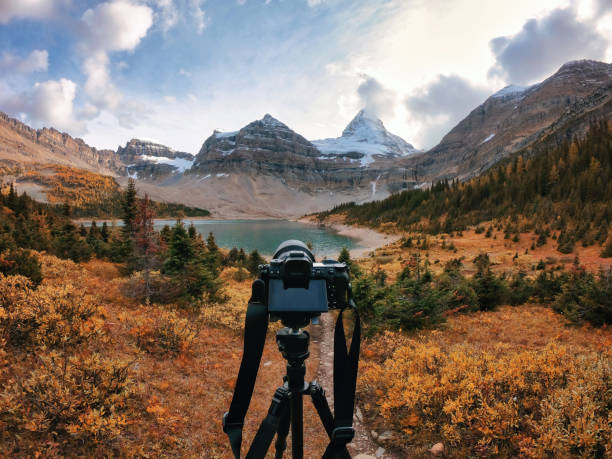


 Nowadays, the best way to enhance your photography skills is to capture images taken in locations that can inspire you to be creative in presenting landscapes. Those who have a burning desire to create the best photography for exhibits, or for showcasing fashion and other products, develop not only photo-taking techniques but also ways for finding the best location.
 Planning may include arranging for a transport vehicle that is not too small but big enough to carry the planned props and equipment.
 While most photography buffs join other photographers via photo clubs, some photo enthusiasts prefer to join cycling, hiking or any outdoor sports groups so they can make their own discoveries. In most cases, there are locations near you that merely requires a closer look to reveal its potential as a great photography location.


 We’ve all seen those stunning living room photos in magazines, sunlight pouring through sheer curtains, a coffee table perfectly styled, and a couch that looks as soft and flawless as the day it was bought. What most people don’t realize is that the secret behind that polished, “fresh out of a catalog” look often comes down to something simple: professional couch cleaning.
 Jeju Island’s nightlife glows with a unique charm that beckons photographers. Its exclusive lounges, with their captivating designs, are perfect for capturing the essence of a vibrant evening. These venues blend modern elegance with the island’s natural allure, creating spaces that feel both intimate and luxurious. For photography enthusiasts, these lounges offer a canvas of soft lighting, rich textures, and bold architectural details that demand to be framed. This guide will help you navigate Jeju’s nightlife and capture its mood through your lens.
 Photography sparks creativity in millions around the globe every day. Aspiring photographers constantly look for fresh ways to improve their skills and find inspiration through stunning visuals. Thanks to digital platforms, learning and exploring photography has become easier than ever. You can now access workshops, editing tools, and world-class galleries from the comfort of your home without spending a fortune.
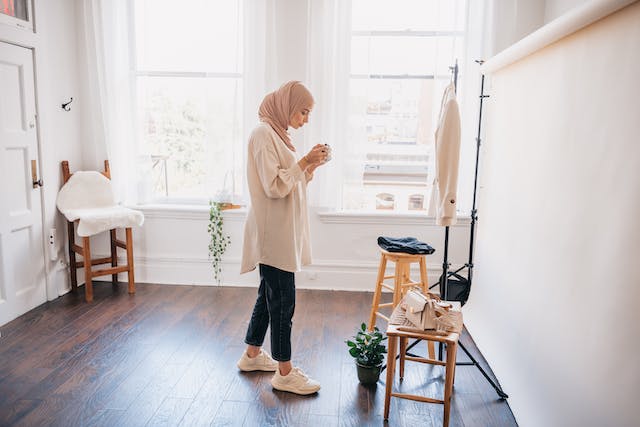
 Keeping a clean space is important not just for comfort, but also for presentation—especially in photography. Whether you’re taking real estate photos, product shots, or indoor lifestyle pictures, a spotless carpet by PRO Carpet Cleaning Sunshine Coast, can make or break the image. While many people focus on lighting and composition, the condition of the background, especially the flooring, can affect the final result more than expected.
 Isopods may not be the first creatures that come to mind when considering
 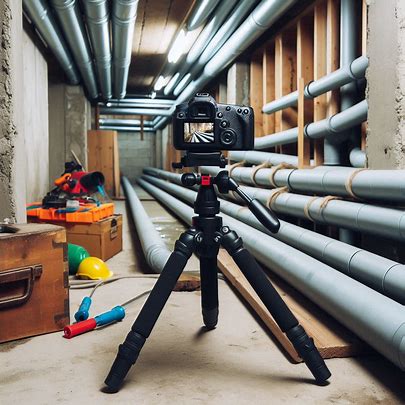 Plumbing repairs and installations often happen in places that aren’t particularly glamorous—under sinks, behind walls, or in dark basements. However, when captured with time-lapse, these spaces become dynamic stages of transformation. What makes this so fascinating is the ability to compress time and show a sequence of actions that would otherwise go unnoticed.
 Have you ever walked into an air-conditioned room on a scorching summer day, only for your glasses to fog up instantly? Annoying, right? Well, your camera feels the same way. Sudden temperature shifts—from the heat of the outdoors into a cool, AC-blasted room—can cause lens fogging and condensation that might make your camera sweat more than you do after an intense photoshoot. And trust me, your expensive gear doesn’t like it. Whether you’re shooting indoors or stepping into a climate-controlled space set up by an aircon installer Brisbane, understanding how condensation forms is key to